Welcome to our guide on integrating a cookie consent banner with your WordPress site. WordPress powers a vast portion of the web, from personal blogs to large-scale e-commerce stores. With this widespread use comes the responsibility of adhering to global privacy regulations like the GDPR and CCPA. A crucial part of this compliance is informing visitors about the use of cookies and obtaining their consent. Manually managing this can be complex, often requiring code modifications. The Consentik CMP simplifies this entire process, providing a straightforward solution to deploy a customizable and compliant cookie banner, helping you build trust with your audience while meeting legal requirements effortlessly.
Step 1: Configure Your Banner in the Consentik Dashboard
Before installing the plugin, you need to create and configure your cookie banner within the Consentik platform.
- Start by creating an account at
https://cmp.consentik.com/admin/register. - Once registered, create a domain for your website and complete the onboarding steps.
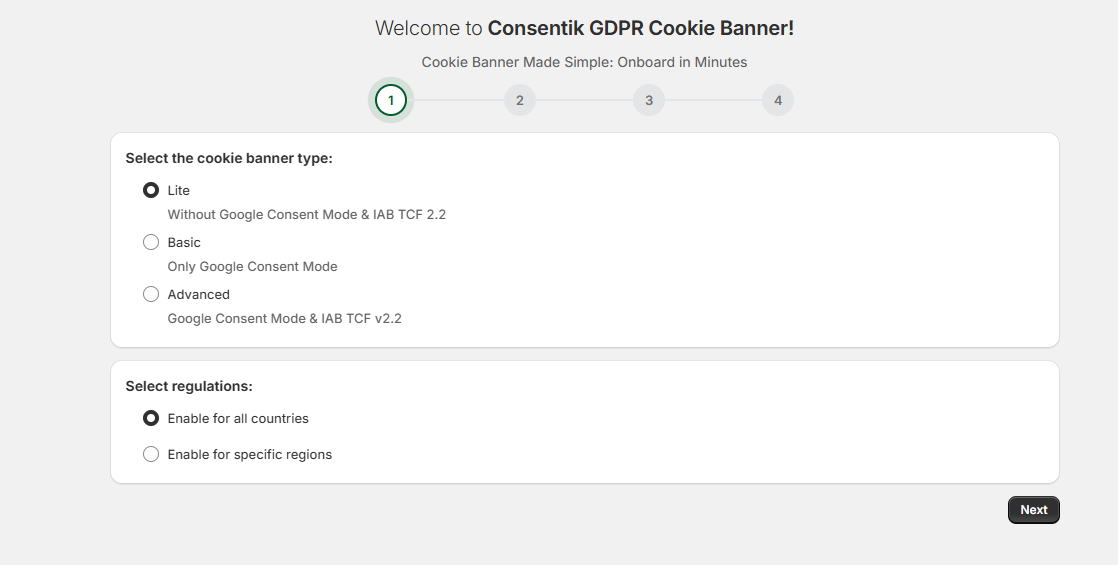
- During this process, you will customize your banner’s behavior:
- Select the cookie banner type: Choose from Lite, Basic, or Advanced options based on your needs.
- Select regulations: Enable the banner for all countries or for specific regions.
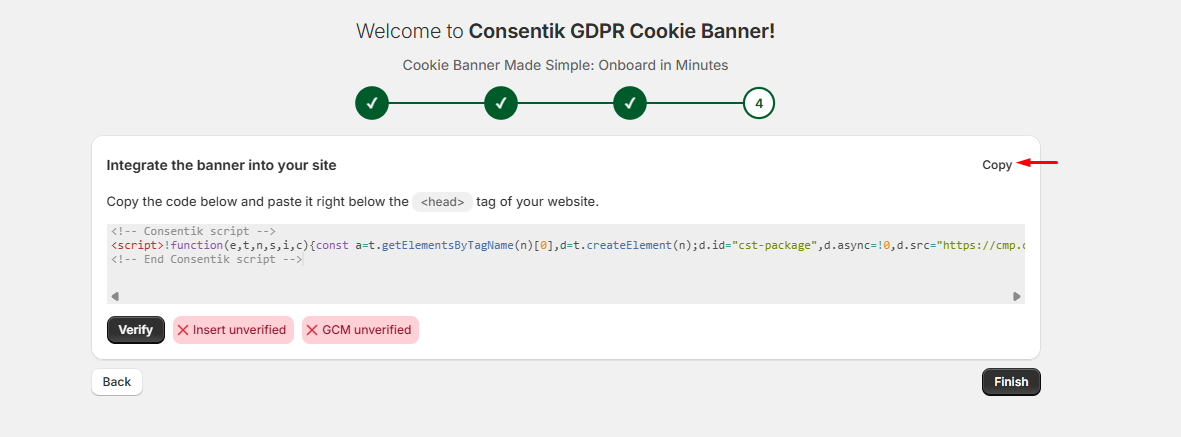
- Once you complete the onboarding steps, the app will generate your unique installation code. This code needs to be pasted into your website’s <head> tag. Click the Copy button to copy the code to your clipboard.
Step 2: Install the Consentik CMP on WordPress
Automatic installation
- Log in to your WordPress dashboard.
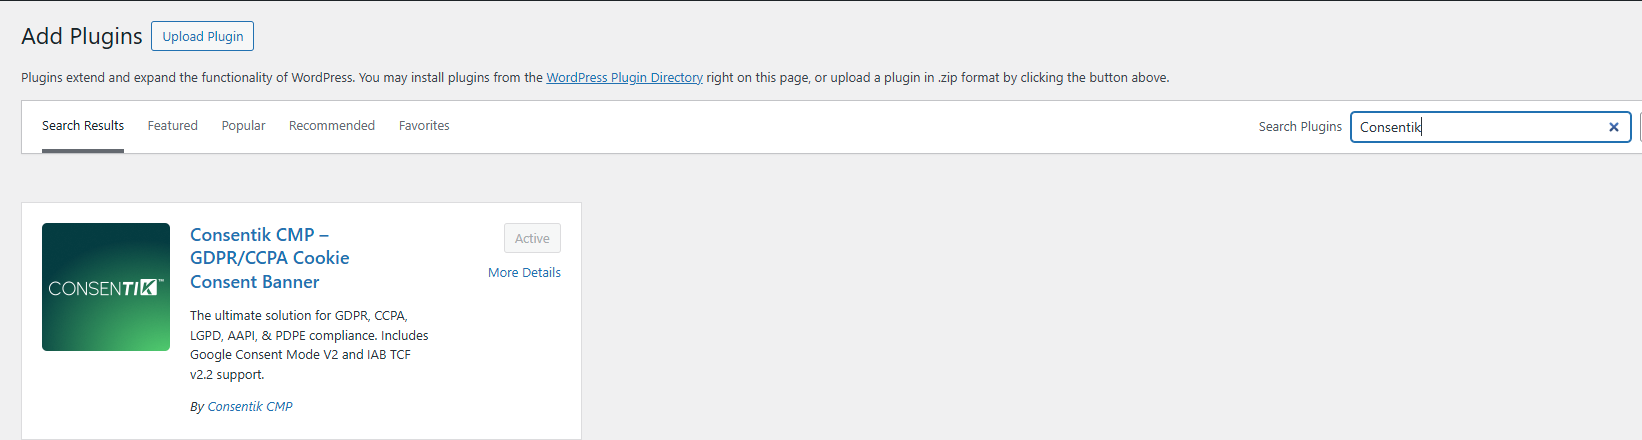
- Go to “Plugins” > “Add New”.
- Search for “Consentik”.
- Click “Install Now” and then click “Activate”.
Manual installation
Another way to add the banner to WordPress is by using the dedicated Consentik plugin.
- First, you need to download the Consentik CMP WordPress Plugin. The downloaded file will be a
.zipfile.
- Log in to your WordPress Admin dashboard.
- From the main navigation menu on the left, go to Plugins and click on Add New.
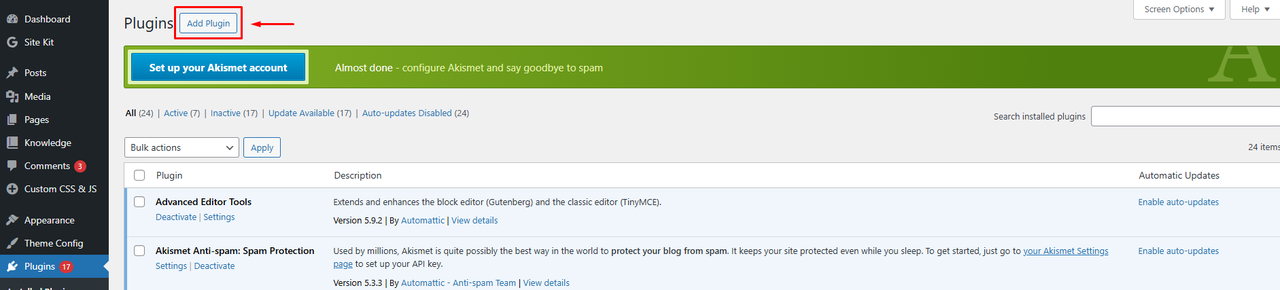
- On the “Add Plugins” page, click the Upload Plugin button located at the top.
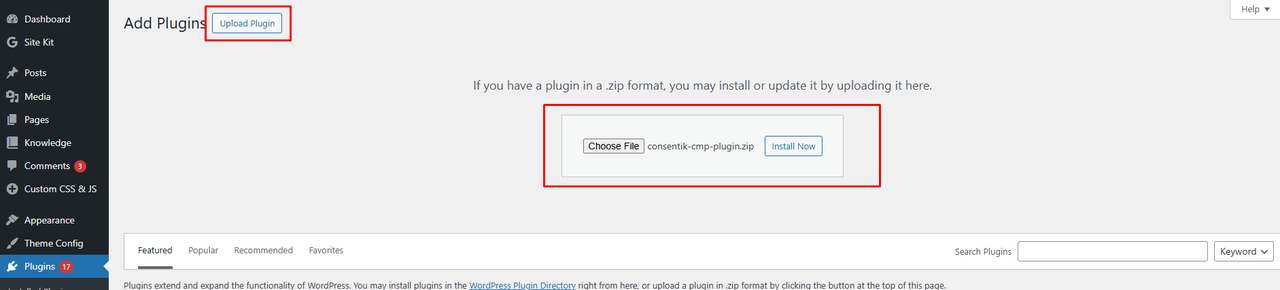
- Click Choose File, select the
consentik-cmp-plugin.zipfile you downloaded earlier, and click Install Now.
Step 3: Activate and Configure the Plugin
Once the plugin is installed, the final step is to activate it and connect it to your Consentik account.
- After the installation is finished, click the Activate Plugin button.
- Navigate to the Consentik CMP settings page, which will now appear in your WordPress sidebar.
- In the Consentik CMP Configuration section, you will see two fields: Site ID and Instance ID.
- Enter the corresponding IDs that you obtained from your Consentik account in Step 1.
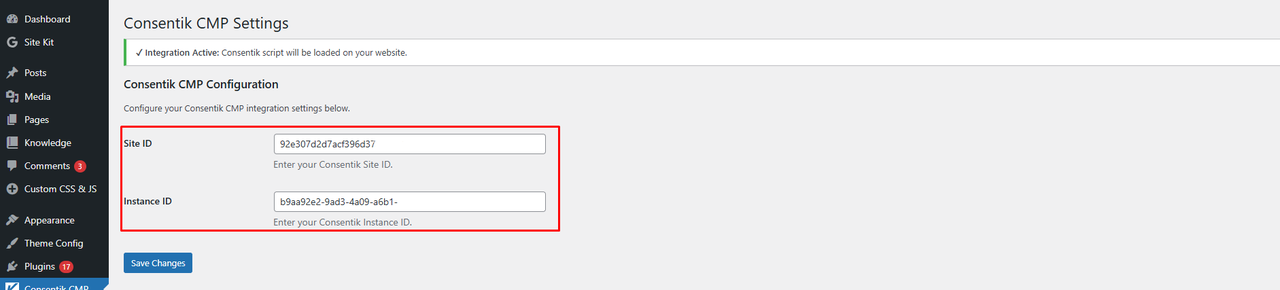
- Click the Save Changes button. Your Consentik cookie banner will now be active on your website.