Welcome! This guide will walk you through setting up a Consentik GDPR Cookie Banner on your Webflow website. Integrating a cookie consent banner is a simple process that can be completed in just a few minutes by following the steps below.
Step 1: Create and Configure Your Consentik Cookie Banner
To begin, you will need to set up your banner within the Consentik platform.
1: Create an account at https://cmp.consentik.com/admin/register.
2: After creating your account, proceed to create a domain and follow the onboarding steps.
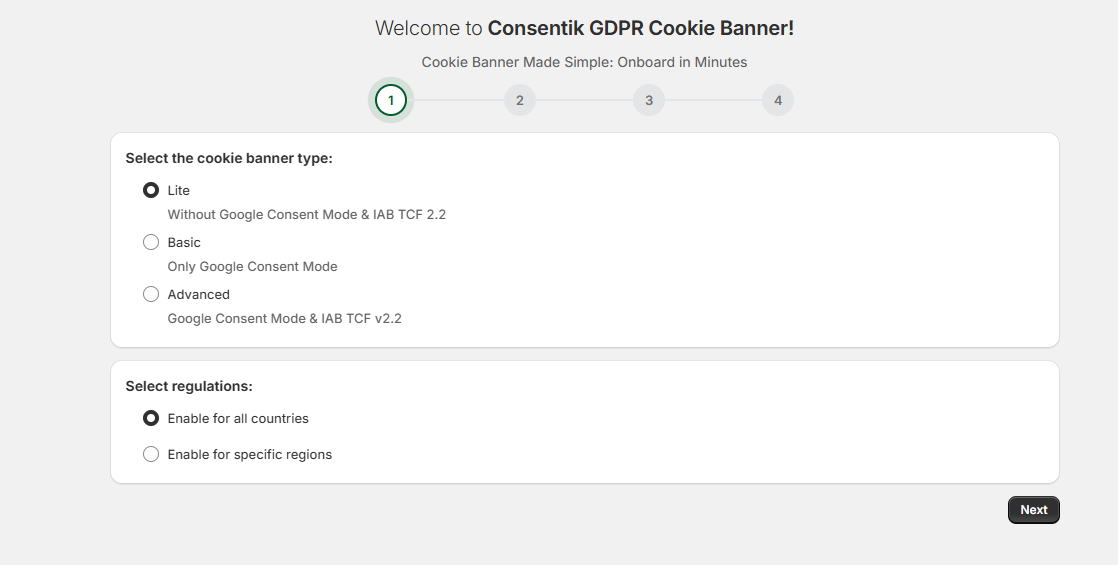
3: During the onboarding process, you will configure your banner by making the following selections:
- Select the cookie banner type: You can choose between Lite, Basic, and Advanced options depending on your needs for features like Google Consent Mode.
- Select regulations: Choose to enable the banner for all countries or only for specific regions.
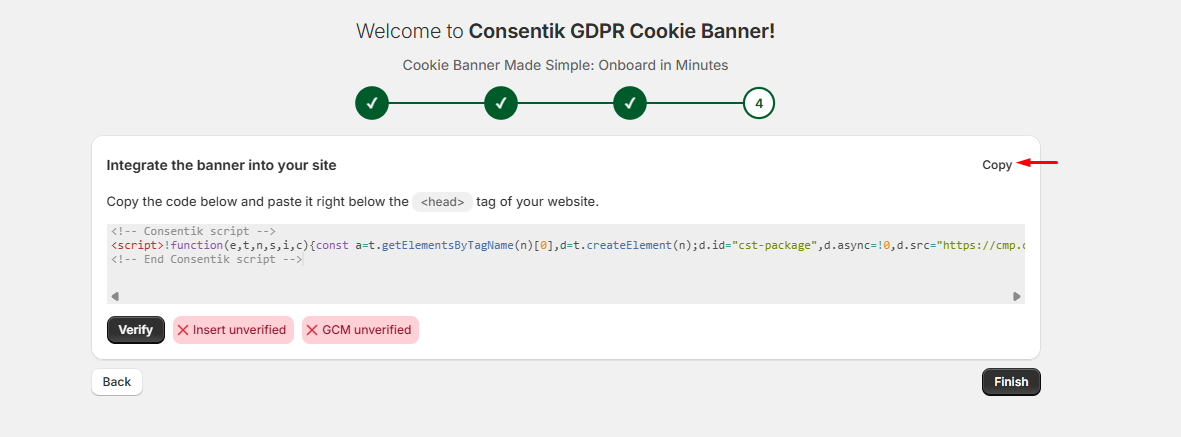
Once you complete the onboarding steps, the app will generate your unique installation code. This code needs to be pasted into your website’s <head> tag. Click the Copy button to copy the code to your clipboard.
Step 2: Add the Cookie Banner Code to Your Webflow Website
With the code copied, you can now integrate it into your Webflow project.
- Head to your Webflow Dashboard > Project Workspace and select Settings for your project.

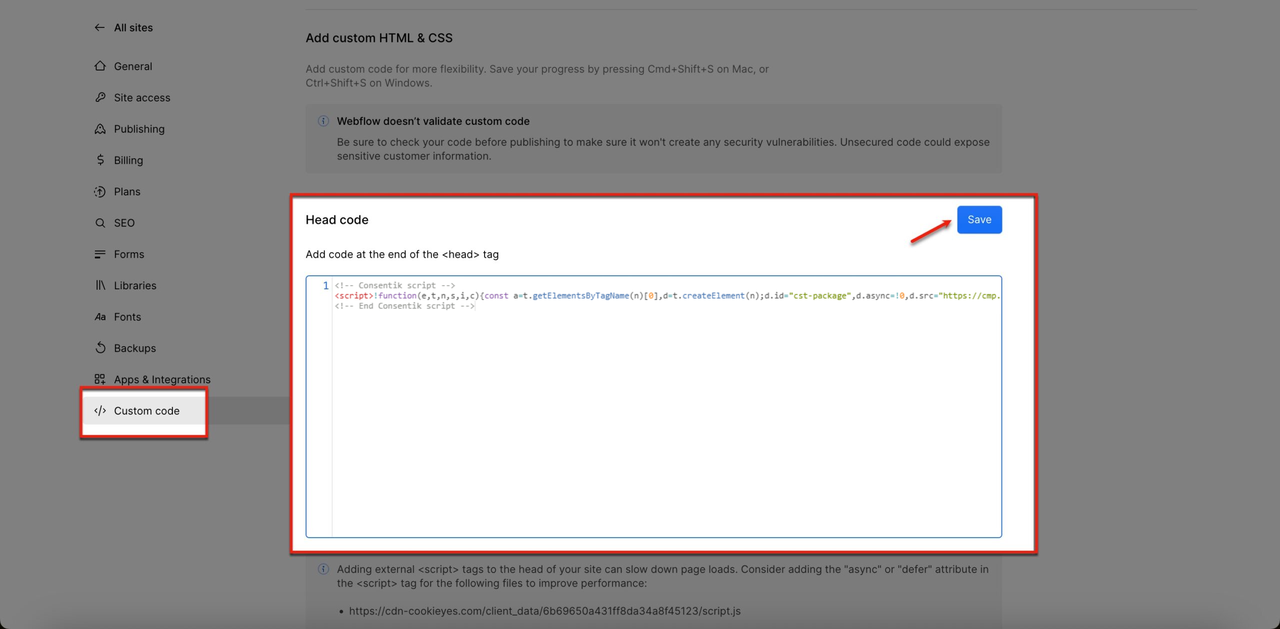
- On the Setting page, navigate to and click on the Custom Code tab.
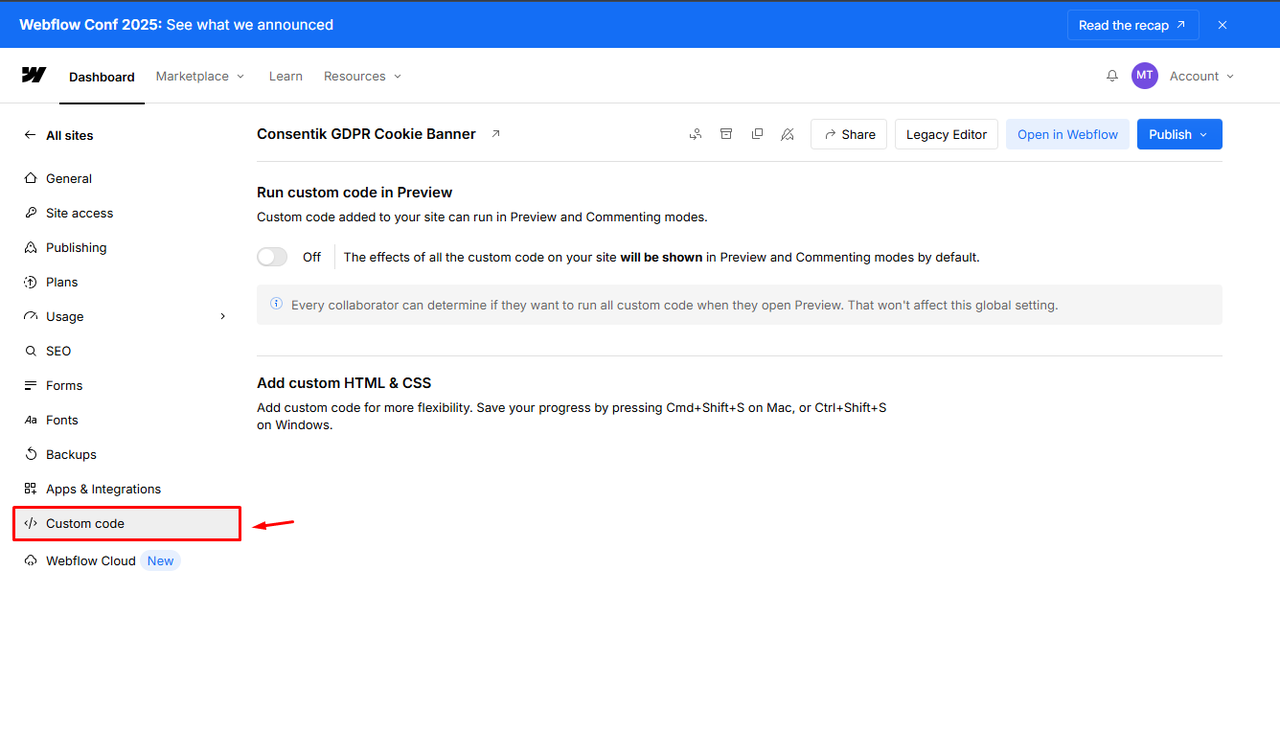
- Paste the installation code you copied from Consentik into the Head Code section. This action adds the code to the end of the
<head>tag on your site. Click the Save button to save your changes.
- To make the cookie banner appear on your website, you must publish the changes. Click the Publish button.
Step 3: Verify Your Installation
After publishing your site, head back to the Consentik setup screen where you copied the code. Click the Verify button to confirm that the banner has been successfully installed on your site.