The Consent Banner is a crucial tool to help your website comply with privacy and data protection regulations, such as GDPR and CCPA, by collecting and managing user consent for the use of cookies and other tracking technologies.
Check the official document of Google Consent Mode V2 setup for more detailed information.
Follow the steps below to integrate the Consent Banner by Consentik correctly:
Step 1: Access the Consentik Admin Page
Open your browser and go to: https://cmp.consentik.com/admin.
This is the Consentik admin dashboard where you will begin the configuration and integration process for the Consent Banner.
Step 2: Log In or Register an Account
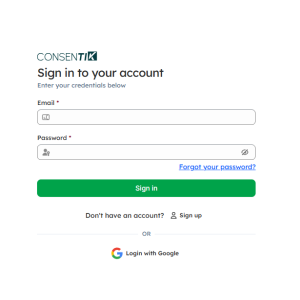
- If you already have an account, enter your login credentials (email and password) to access the dashboard.
- If you do not have an account, click on the “Sign up” option and follow the instructions to create a new account. After registering, log in to proceed.
Step 3: Add a Domain
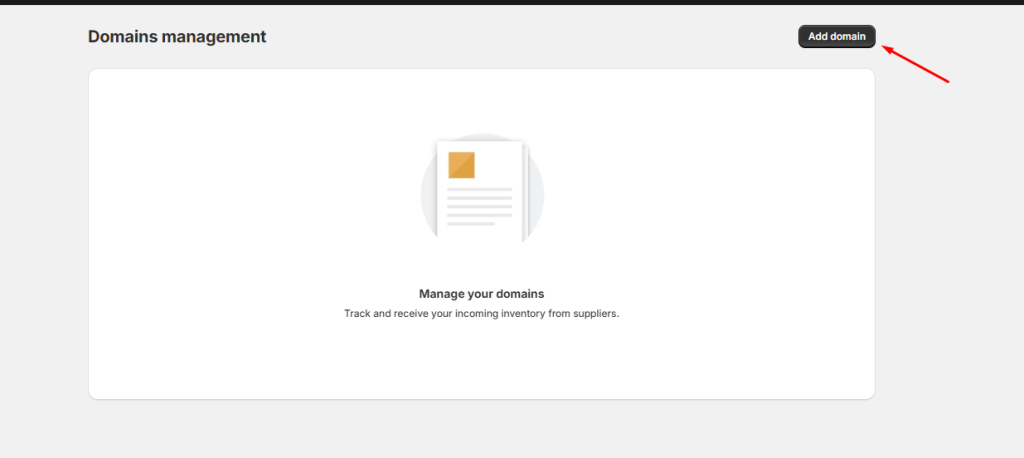
- Once logged in, navigate to the dashboard and click on the “Add domain” option.
- Enter a name for the domain (e.g., “My Website”) and input the domain address where you want to integrate the Consent Banner (e.g., example.com).
- Click “Save” to add the domain to the system.
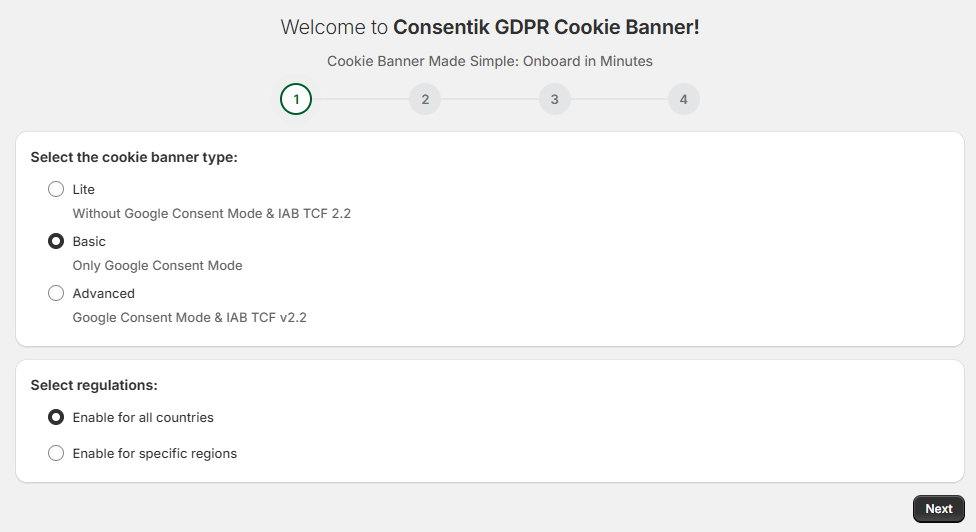
Step 4: Finish the onboarding steps (Wizard)
- Select cookie banner type. Choose Basic or Advanced if you would like to implement Google Consent Mode V2 to your website. And select the regions for Cookie Banner
2. (For Basic and Advanced type) Config the Google Consent Mode V2.
- In this step, you have some settings for Google Consent Mode V2
- If you are using Consentik GDPR CMP Template on Google Tag Manager, just check the option “Use Consentik GTM Template on Google Tag Manager”
- If you are not using Consentik Template, you can config the consent type for Google Consent Mode V2
- Enable/Disable option debugger.

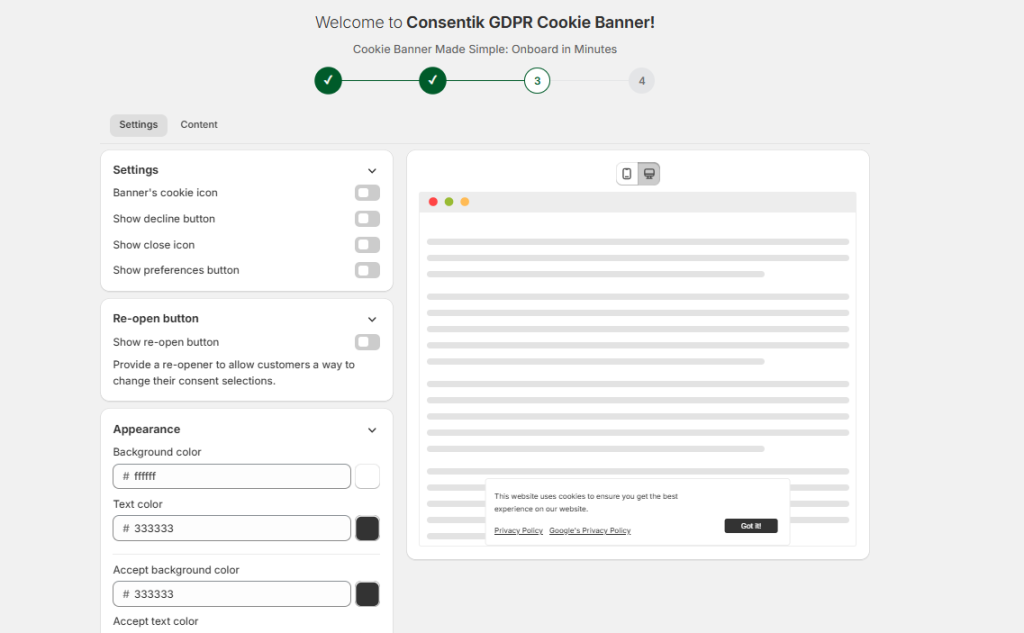
3. There are 2 scenarios for this step:
- If you choose the Basic type, in this step, you can configure the cookie banner’s content and appearance.
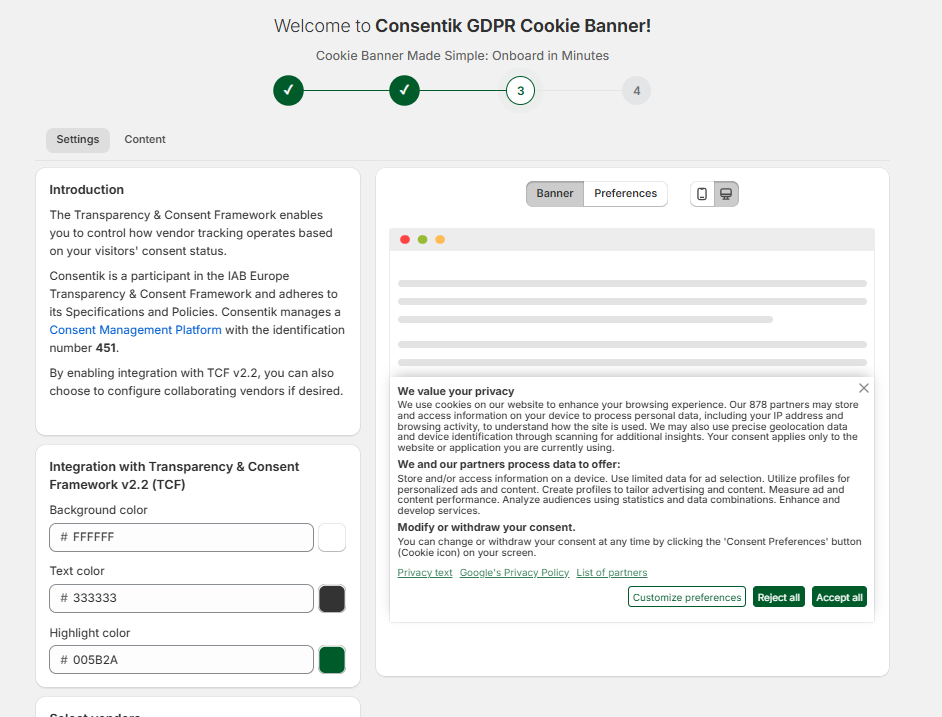
- If you choose the Advanced type, in this step, you can configure the IAB TCF v2.2 banner, including the IAB TCF v2.2 Vendor List, Google Ads Tech Provider, and the banner’s content and appearance.
- Copy the generated script code and paste it right below the
<head>tag in theindex.htmlfile of your website.- The script looks like this:
<!-- Consentik script -->
<script>!function(e,t,n,s,i,c){const a=t.getElementsByTagName(n)[0],d=t.createElement(n);d.id="cst-package",d.async=!0,d.src="https://cmp.consentik.com/sites/xxx-xxx-xxx-xxxx/xxxxxxxxxxx/index.js?v="+(new Date().getMinutes()),a.parentNode.insertBefore(d,a)}(window,document,"script");</script>
<!-- End Consentik script -->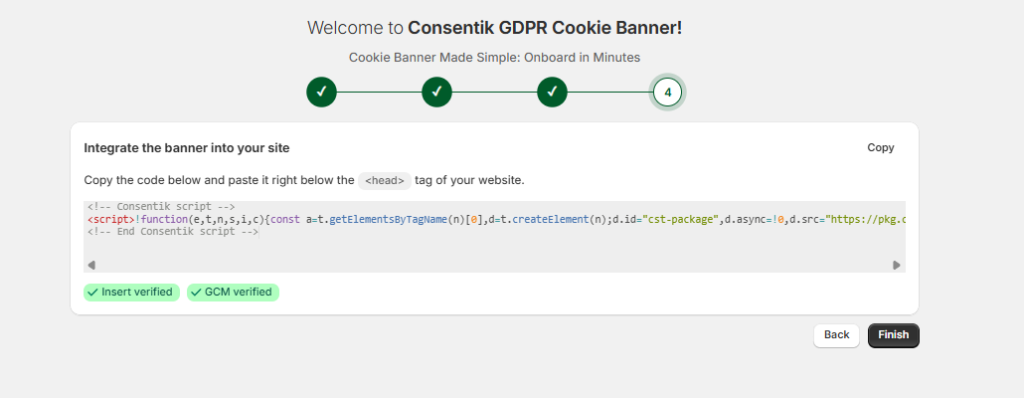
Step 5: After finish onboarding steps, you can change the configurations on page Google Consent Mode V2 and IAB TCF v2.2
– Configure Google Consent Mode V2
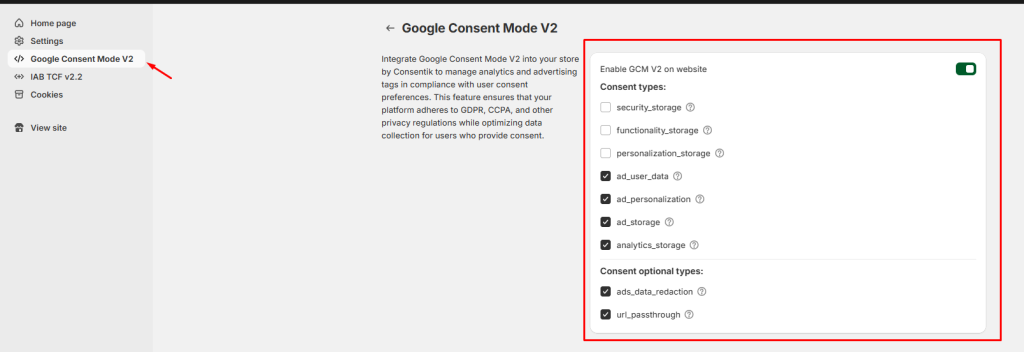
- In the dashboard, navigate to the “Google Consent Mode V2” page.
- Enable/Disable option “Use Consentik GTM Template on Google Tag Manager”
- Select the appropriate consent types for your website, such as:
analytics_storagead_user_dataad_personalizationad_storage
- After making your selections, click “Save” to store the configuration.
- Verify if Google Consent Mode V2 implemented into your website
- Enable/Disable Debug mode for Google Consent Mode v2
– Configure IAB TCF v2.2
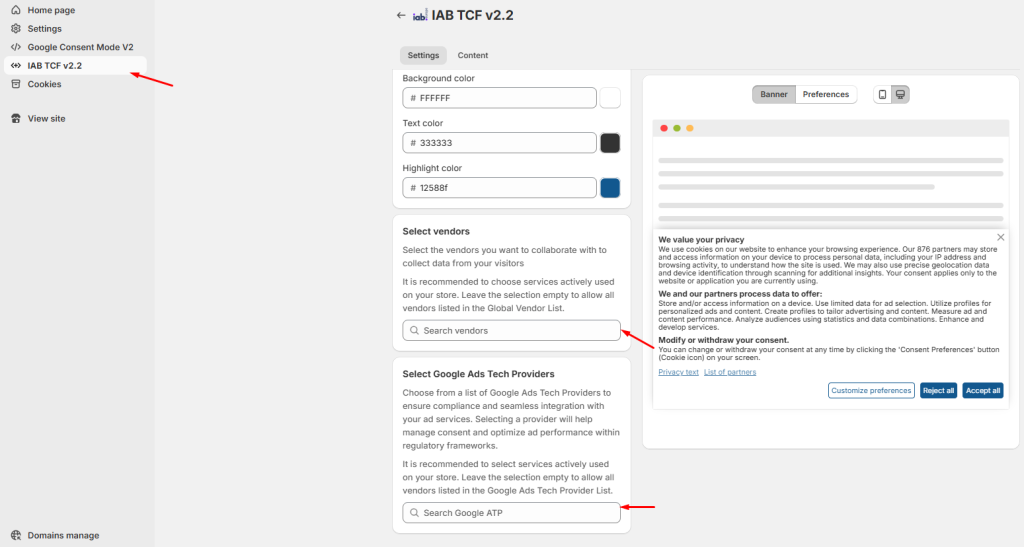
- Access the “IAB TCF v2.2” page in the dashboard.
- Choose the “Vendor list” for IAB TCF v2.2 (the list of vendors to integrate).
- Select “Google Ads Tech Provider” to link with Google’s advertising services.
- Customize the banner’s colors and content:
- Adjust the background color, text color, or other UI elements.
- Edit the text content to align with your website and legal requirements.
- Click “Save” to apply the configurations.
Step 6: (Optional) Adjust Additional Settings
- Go to the “Settings” page if you wish to further customize the banner.
- Some optional settings include:
- Reopen Button: Add a button allowing users to reopen the Consent Banner.
- Geolocation: Configure the banner to display based on the user’s geographic location (e.g., only for users in the EU).
- Make the necessary adjustments and click “Save” to apply the changes.
Step 7: Test the Consent Banner
- Use the Google Tag Assistant tool at https://tagassistant.google.com/.
- Install the extension or use the online tool, then open your website.
- Verify:
- The Consent Banner displays correctly.
- The configured consent types are functioning as expected.
- If any issues are detected, revisit the previous steps to check and correct the configurations.